

Winterizing
How To Winterize Your Flagstaff Camping Trailer
The six parts of the water system most at risk of freezing are:
- Water heater ($$$)
- Cassette toilet/toilet ($$$)
- Water tank ($$)
- Water pump ($$)
- Water filter canister ($$)
- Faucet(s) ($)
If you can't fully winterize the camper for some reason (no time to winterize before a freezing night, you're out of town and a neighbor is trying to save the day, etc.) and you want to minimize the potential damage that freezing temperatures can inflict: pull the plug from the water heater (step 3 & 4 in Hot Water section below). That alone could spare hundreds of dollars in repair.
If you have more time but no anti-freeze and no air compressor the next best option is the gravity drain.
Gravity Drain
Most Flagstaffs with hot water systems have a "gravity drain" option using two simple shut-off valves. Locate the two T-handle valves on the floor of the camper (usually on the floor under the galley, under the exterior shower, or in a corner of the camper box). Open the valves as well as the sink faucet (to break the vacuum) and--in theory--water should drain out of the camper using nothing more than gravity.
The problem with the gravity drain is that low spots in the water line may still have water in them and water in the water filter canister cannot escape. For this reason we recommend a more thorough winterizing procedure.
A More Thorough Winterizing Procedure:
Note: You can winterize most pop-up campers with non-toxic RV anti-freeze or with an air compressor. The following instructions include both methods.
Choose your camper's water system:
- Flagstaff with cold water only
- Flagstaff with hot water package (incl. exterior shower)
- Flagstaff with interior shower/cassette toilet and exterior shower
- Flagstaff High Wall with residential-style toilet, interior shower, and exterior shower
- Drain the cold water tank (turn the tank drain valve 180° to drain).
- Locate the water pump and remove the hose fitting that joins the cold water tank supply line to the pump (an arrow is embossed on the pump's plastic that shows the direction of water flow--and make sure the water pump is turned off); have a towel handy because a small amount of water is going to drip out of the pump even with the pump turned off.
Anti-Freeze
- Attach a separate hose (about 24" long) to the pump inlet and place the other end of hose into a jug of anti-freeze.
- Turn on the pump and open the faucet.
- When the water coming out of the faucet turns pink turn the pump off
- Remove the sink drain plug/strainer so anti-freeze will go through the drain line and protect the p-trap.
- Remove the short hose from the pump (have a towel handy for the anti-freeze that will leak out) and re-attach the line from the cold water tank to the pump.
Air
- Place an air nozzle/air blower into the pump's inlet and create a temporary seal between the nozzle and pump fitting with a towel, paper towel, or glove (no threaded connection is necessary but it doesn't hurt, either).
- Open the faucet.
- Blow air through the line until the water coming out of the faucet is reduced to only a small trace of water vapor.
- Re-attach the line from the cold water tank to the pump.
- Open the sink drain plug and repeat the blow out procedure for the drain line to remove water from the p-trap.
- Drain the cold water tank (turn the tank drain valve 180° to drain).
- On the back-side of the water heater (inside the camper) turn the bypass fittings to their "bypass" position (bypass details).
- On the front-side of the water heater (outside the camper) open the water heater access door and open the pressure-relief valve.
- Remove the water heater drain plug (this requires a 1 1/16" socket) to drain the water from the water heater (stand clear--the water comes out towards you in a hurry).
- Check the condition of the anode rod attached to the drain plug--replace if necessary (anode details).
- Once the water has drained from the water heater tank close the pressure-relief valve and put the drain plug back in.
- If you camper is equipped with a water filter remove the filter from the canister and put the canister back in place (empty).
- Locate the water pump and remove the hose fitting that joins the cold water tank supply line to the pump (an arrow is embossed on the pump's plastic that shows the direction of water flow); have a towel handy because a small amount of water is going to drip out of the pump.
Anti-Freeze
- Attach a separate hose (about 24" long) to the pump inlet and place the other end of hose into a jug of anti-freeze.
- Turn on the pump and open the cold-water side of the sink faucet.
- When the water coming out of the faucet turns pink turn off the cold-water side and turn on the hot-water side until it turns pink as well.
- Repeat this process for the exterior shower.
- Turn the pump off and open either side of the faucet again to relief any pressure built up by the water pump.
- Remove the sink drain plug so anti-freeze will go through the drain line and protect the p-trap.
- Remove the short hose from the pump (have a towel handy for the anti-freeze that will leak out) and re-attach the line from the cold water tank to the pump.
- Remove the water filter canister (again) and pour the anti-freeze into the sink. Put the canister (empty) back in place.
Air
- Place an air nozzle/air blower into the pump's inlet and create a temporary seal between the nozzle and pump fitting with a towel, paper towel, or glove (no threaded connection is necessary but it doesn't hurt, either).
- Open the cold-water side of the faucet.
- Blow air through the line until the water coming out of the faucet is reduced to only a small trace of water vapor.
- Close the cold-water side and turn on the hot-water side.
- Repeat the blow-out process for the hot-water side, then each side of the exterior shower.
- Re-attach the line from the cold water tank to the pump.
- Open the sink drain plug and repeat the blow out procedure for the drain line to remove water from the p-trap.
- Remove the water filter canister (again) and pour out any remaining water. Put the canister (empty) back in place.
Follow the instructions for winterizing a camper with a hot water system (above) for the water system (adding the interior shower faucet to the instructions, of course.) Then follow the cassette toilet instructions.
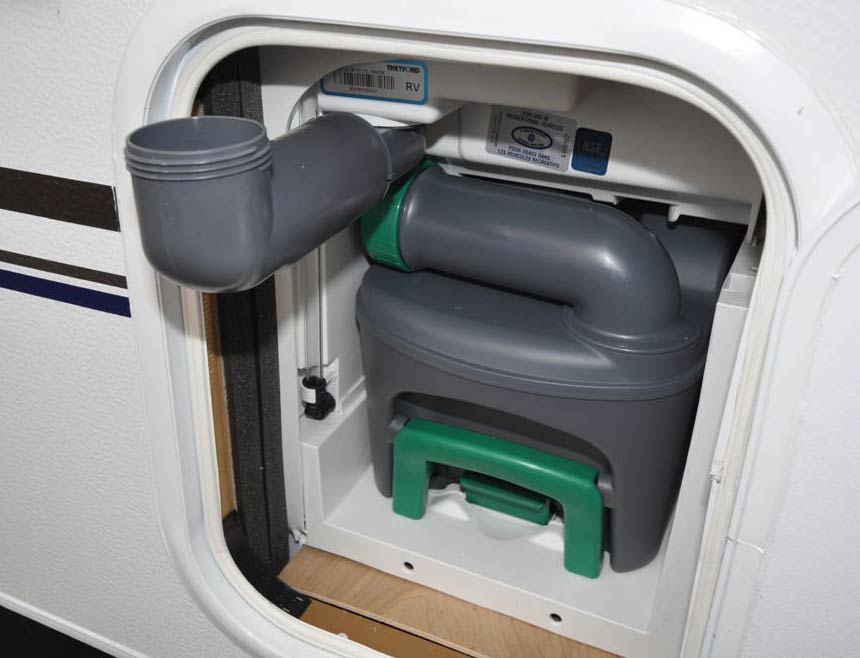
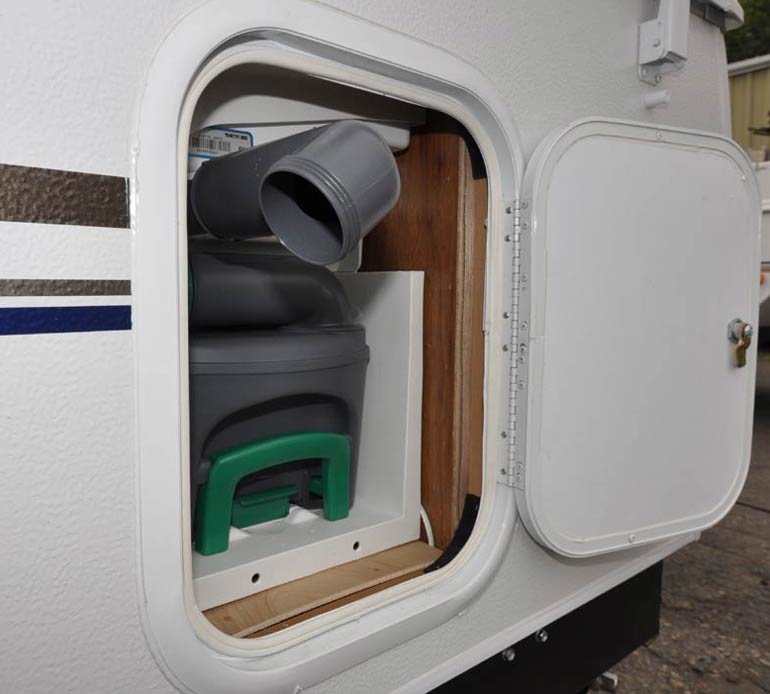
To winterize the cassette toilet:
- Open the cassette toilet access door (outside the camper).
- Swing the fill tube out and open the cap (as you would to fill the tank with fresh water).
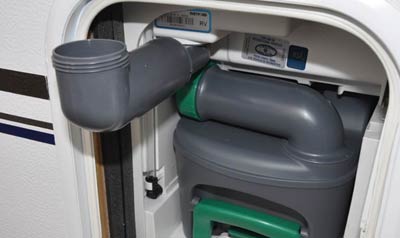
- Rotate the fill tube to allow any water in the tube to drain out (on the ground).
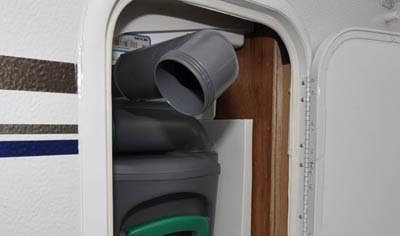
- Once empty, replace the cap on the fill tube and return it to its stored position.
- Pull the glass indicator tube from it's holder near the bottom of the access area.
- Pull the glass indicator tube downward such that the tube disconnects from it's rubber top near the top of the access area.
- Swing the glass tube outside the access area and let it hang upside-down so that the fresh water in the cassette tank can drain.
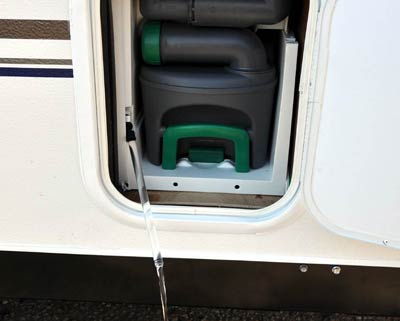
- Once all of the water has drained from the tube, replace the glass tube into it's rubber top and holder.
- Close the access door.

- Drain the cold water tank (turn the tank drain valve 180° to drain).
- On the back-side of the water heater (inside the camper) turn the bypass fittings to their "bypass" position (bypass details).
- On the front-side of the water heater (outside the camper) open the water heater access door and open the pressure-relief valve.
- Remove the water heater drain plug (this requires a 1 1/16" socket) to drain the water from the water heater (stand clear--the water comes out towards you in a hurry).
- Check the condition of the anode rod attached to the drain plug--replace if necessary (anode details).
- Once the water has drained from the water heater tank close the pressure-relief valve and put the drain plug back in.
- If you camper is equipped with a water filter remove the filter from the canister and put the canister back in place (empty).
- Locate the water pump (this is oftentimes behind an access panel in High Wall units) and remove the hose fitting that joins the cold water tank supply line to the pump (an arrow is embossed on the pump's plastic that shows the direction of water flow); have a towel handy because a small amount of water is going to drip out of the pump.
Anti-Freeze
- Attach a separate hose (about 24" long) to the pump inlet and place the other end of hose into a jug of anti-freeze.
- Turn on the pump and open the cold-water side of the sink faucet.
- When the water coming out of the faucet turns pink turn off the cold-water side and turn on the hot-water side until it turns pink as well.
- Repeat this process for the exterior shower and interior shower.
- Pull the toilet flush handle forward to allow water to flow until it turns pink.
- Turn the pump off and open either side of the faucet again to relief any pressure built up by the water pump.
- Remove the sink drain plug so anti-freeze will go through the drain line and protect the p-trap.
- Remove the short hose from the pump (have a towel handy for the anti-freeze that will leak out) and re-attach the line from the cold water tank to the pump.
- Remove the water filter canister (again) and pour the anti-freeze into the sink. Put the canister (empty) back in place.
- Open the gray water tank (or empty the black water tank at a dump station) to drain any water left in the holding tanks.
Air
Due to the length and complexity of the water lines in a High Wall camper we recommend winterizing High Wall units with anti-freeze as described above.
Privacy © 2009-2024 Roberts Sales. All rights reserved.